There’s something deeply satisfying about crafting something for your dog with your own hands. Whether your pup is a tiny Chihuahua or a big, fluffy Golden Retriever, every dog deserves a comfy spot to call their own. That’s where a DIY dog bed comes in. Not only is it a great way to save money, but it also allows you to customize the bed to perfectly suit your dog’s size, preferences, and your home’s style.
This step-by-step guide will teach you how to make a dog bed that’s both functional and stylish, complete with customization options for every skill level.
Why Make a DIY Dog Bed?
Before diving into the how-to, let’s talk about why you should consider making a dog bed yourself.
- Cost-Effective: Store-bought dog beds can be pricey, especially for larger dogs. A DIY option can save you a significant amount.
- Customization: You can tailor the bed’s size, color, and materials to your dog’s needs and your home’s aesthetic.
- Eco-Friendly: Repurpose old materials like pillows, blankets, or furniture to reduce waste.
- Love in Every Stitch: There’s something special about creating something with your own hands for your pet.
Materials You’ll Need
Before you start, gather these materials. You can adjust based on your design and what you have on hand.
| Material | Purpose |
|---|---|
| Fabric | For the outer cover (durable and washable). |
| Stuffing/Old Pillows | To make the bed soft and comfortable. |
| Sewing Machine/Needle | For assembling the fabric cover. |
| Scissors | For cutting fabric. |
| Measuring Tape | To measure the fabric to your desired size. |
| Zipper/Velcro (optional) | For removable covers. |
| Foam Mattress (optional) | For orthopedic support for older dogs. |
Step 1: Choose the Right Design
Not all dogs are the same, and neither are dog beds. Before starting, consider:
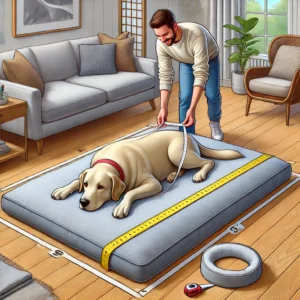
- Your Dog’s Size: Measure your dog when they’re lying down comfortably, and add 6–12 inches for extra room.
- Sleeping Habits: Does your dog sprawl out or curl up? Sprawlers need a rectangular bed, while curlers may prefer a round or oval shape.
- Location: Where will the bed be placed? Choose materials and colors that complement the space.
Step 2: Measure and Cut Your Fabric

- Decide the Dimensions: For a medium-sized dog, a 30×40-inch rectangle is a good starting point. For smaller dogs, go with 20×25 inches, and for larger breeds, aim for 40×50 inches or more.
- Cut Two Pieces of Fabric: These will serve as the top and bottom of your dog bed. Leave an extra inch around all sides for seam allowance.
Step 3: Add the Stuffing
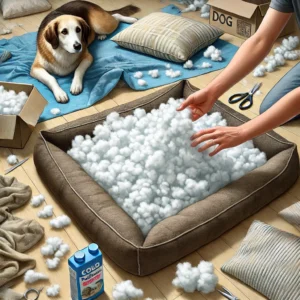
For a soft, plush bed:
- Use old pillows, blankets, or polyester stuffing.
- Spread the stuffing evenly, ensuring there are no lumps.
For a firmer, orthopedic bed:
- Cut a piece of foam mattress to size. Memory foam is a great option for older dogs with joint issues.
Step 4: Assemble the Bed
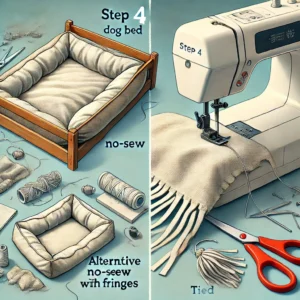
Option 1: Sewn Bed
- Place the two fabric pieces together, with the “good” sides facing inward.
- Sew along three sides, leaving one side open.
- Turn the fabric right-side out.
- Insert the stuffing or foam into the opening.
- Sew the final side shut or attach a zipper for easy removal.
Option 2: No-Sew Bed
- Use fleece fabric and cut fringe along all sides.
- Tie the fringe pieces together, leaving one side open.
- Add the stuffing, then tie the remaining fringe shut.
Step 5: Add Custom Touches
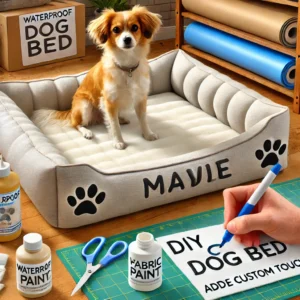
Make the bed as unique as your dog by adding special features:
- Personalization: Use fabric paint or iron-on letters to add your dog’s name.
- Waterproof Liner: Add a waterproof layer under the cover for easy cleaning.
- Raised Edges: For dogs that like to rest their heads, sew or tie extra fabric around the edges and stuff them with foam.
DIY Dog Bed Ideas for Inspiration
Here are some creative DIY dog bed ideas to spark your imagination:
1. Upcycled Suitcase Bed
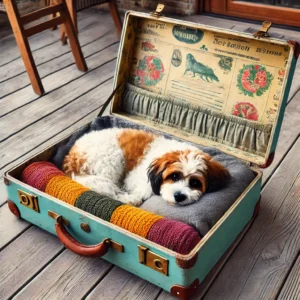
- Use an old suitcase as the base.
- Remove the top half or leave it open for added coziness.
- Add a cushion that fits snugly inside.
2. Pallet Bed

- Sand down an old pallet and paint or stain it.
- Add a mattress or cushions on top.
3. No-Sew T-Shirt Bed
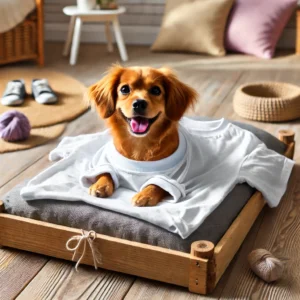
- Take an old T-shirt and stuff it with a pillow.
- Tie the sleeves and bottom together to close it up.
4. Wooden Frame Bed
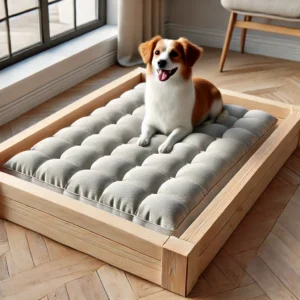
- Build a simple wooden frame and add a custom-fit cushion.
- Paint the wood to match your home decor.
5. Donut Bed for Small Dogs
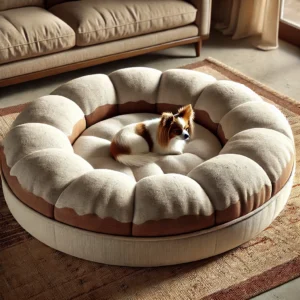
- Use a round pattern and sew raised edges to create a donut shape, perfect for dogs that like to curl up.
Tips for a Long-Lasting DIY Dog Bed
- Washable Covers: Always use machine-washable fabric to make cleaning easier.
- Durable Materials: Choose strong fabrics like canvas or denim for chewers.
- Anti-Slip Base: Add a non-slip mat to the bottom for stability on hardwood or tile floors.
- Regular Maintenance: Check the bed periodically for wear and tear, and replace stuffing if necessary.
Benefits of a DIY Dog Bed
Creating a dog bed isn’t just about saving money—it’s also about creating a space that reflects your love for your pet. Here are some benefits:
- Bonding Time: Your dog will appreciate the effort you put into making their bed.
- Custom Fit: Unlike store-bought beds, a DIY version can be perfectly tailored to your dog’s needs.
- Eco-Friendly: Upcycle old items, reducing waste and giving materials a second life.
FAQs About DIY Dog Beds
1. What’s the Best Material for a Dog Bed?
Durable, washable materials like canvas, denim, or outdoor fabric are ideal. For a softer touch, use fleece or microfiber.
2. Can I Make an Orthopedic Bed for My Senior Dog?
Yes! Use high-density foam or memory foam as the base to provide joint support.
3. How Do I Keep the Bed Clean?
Use a removable, washable cover. For extra protection, add a waterproof liner under the cover.
4. Can I Repurpose Old Items for a Dog Bed?
Absolutely! Old pillows, blankets, T-shirts, or furniture can be transformed into a cozy bed.
5. How Long Does It Take to Make a Dog Bed?
Depending on the design, it can take anywhere from 30 minutes (no-sew) to a couple of hours (sewn beds with custom touches).
Conclusion
A DIY dog bed is more than just a project—it’s a way to show your dog how much you care. Whether you upcycle materials from around the house or start from scratch, the result will be a cozy, personalized space your dog will adore. Plus, you’ll have the satisfaction of knowing you created something special just for them.
Leave a Reply